General remarks
Everyone is interested in Long exposure photography needs to know about Neutral Density Filters. I started with my previous post to give the general description of how to calculate exposure times and i think now it is time to give you a guide about these filters. I thought about presenting my ideas as a regular post but then i decided that it is more pedagogical to show my report in the form of questions. So this is the complete FAQ about neutral density filters. Some points before i start:
- I narrowed my search to only some brands i know or are widely known. If you think that a company not mentioned here deserves a quote please mail me and i will update my post, or simply add a comment below.
- Also if you found some errors concerning the description i gave to the various products or maybe i have forgotten some important characteristics of them please comment and i will also update my report.
- I will try to be objective concerning the use of these filters based on my personal experience or the experience of photographers i admire. Of course these ideas may not reflect the general belief but what can i do about this? It is just my humble report and my ideas after all. Still anyone wants to add his personal experience is welcomed to add his/her comments.
What are the types of ND Filters?
- The ND Filter Screw-in Type: This type gives you the ability to screw in the filter itself into the camera lens and leave it there as a part of the lens, whenever you want to change it or take it off, simply screw it backward and remove it.
- The ND Filter Slot-in Holder Type: This type consists of a holder that fixed (screwed) on the camera lens and provide the ability to slide in any rectangle ND filter into the holder’s dedicated slot.
- Variable ND-Filters Screw-in Type: Density can be varied just by rotating the indicator from Min to Max

Brand:
Formatt Hitech, JJ-Long exposure kit
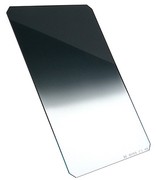
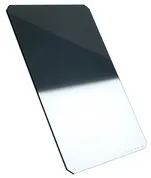
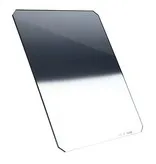
What is a Graduated Neutral Density Filter (GND)?
Half of this filter is clear and the other half goes from Light to Dark to the top of the filter. In the middle of the filter, the amount of filtering increases from 0 stops to 1 – 4 stops usually, towards the top of the filter. You will find them in these 0.3, 0.6 0.9, and lately 1.2 density factors (that is 1, 2, 3, and 4 f-stops reduction). Also the second important characteristic of these filters is the type of gray-graduation (light to dark) from the middle to top. A Soft Edge filter makes a soft gray-graduation while in a Hard Edge filter this graduation happens abruptly. Lets say we have a 4×6″ filter GND 0.3 as an example which is a 6 inches high filter and the bottom 3 inches of it are clear or 0 stop. If it is Soft GND then at the horizon line, it will gradually get darker towards the top from 0 stops to 3 stops of light filtering while in the Hard GND case we will have 3 inches of clear and 3 inches of 3 stop filtering.
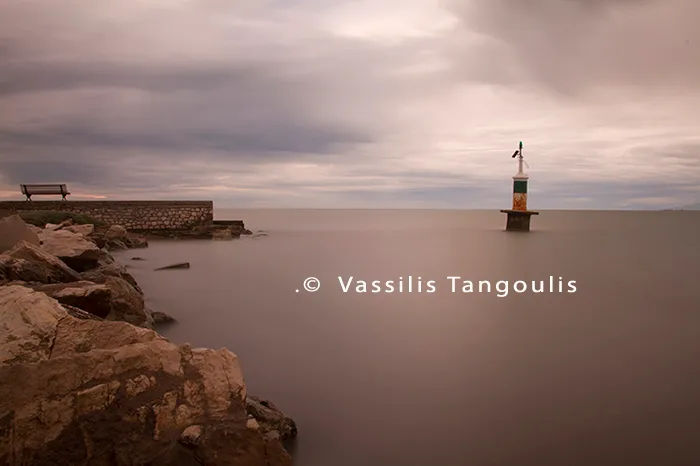
Graduated ND filters are used where there is a large dynamic range between the brightest parts of a scene and the darkest part of a scene. For example a sunset or a scene taken towards the sun where the sky is very bright compared to the land. Without a graduated ND filter you would have to select either the sky or the land to be properly exposed and sacrifice the other to be blown out (pure white) or under exposed (black). So a graduated ND filter will allow to get a much better sunset shot in a single frame, the alternative being to take multiple exposures and blend them together afterwards in Photoshop or Lightroom.
There is also the case of Reverse Graduated filter where the darkest part of the filter is right in the middle of the filter and then gets lighter towards the top of the frame. Most common use for this filter is shooting a sunset when the sun is right on the horizon. You will be reducing the amount of light coming in from the horizon (the sun) and letting the light in from the other parts of the scene.
Technical info:
- More easy-handling are the Soft grads and so more popular whilst hard grads are really only suitable in certain scenarios such as oceanic scenes where you can align the transition line along the horizon. It is important to be aware that GNDs are a compromise, it is not so certain where the transition can occur and if it is exactly where you want in a frame. That is why you end up many times with trees that are darker on the top than the bottom. Someone can say that it is always a matter of post processing but things become almost impossible when the alignment of the horizon with a hard edge GND is problematic .
- Although usually the GNDs are plate filters there are also some Screw-in types. The main problem using Screw-In GNDs is that you have no flexibility playing with the vertical position of their horizon line. And this is a BIG disadvantage.
What is a solid ND filter?
The whole filter is dark and has a specific density factor. Usually these filters are from 0.3-3.0 density factors (until 10 f-stops reduction) both in Screw-In type and Slot-In Holder type. They made from glass or optical resin, with an index of refraction nearly identical to the optical glass (pretty much as the GNDs). Recently we had a new entrance from Singh-Ray. A solid ND filter with 15 f-stops reduction! This will be available in both types (starts from 450 USD)
Technical info:
- All filters produce some optical vignetting with wide lenses, because around the edges and corners the lens is looking through the filter at an angle, so it is effectively thicker and therefore more dense. Again you can correct that in post processing but the effect can be a couple of stops or so with a super-wide and when the corners are lightened by that amount you’re likely to get noise. The best way around that is to shoot at lowest ISO and push the histogram to the right. This delivers as much exposure as the sensor can handle and helps to pull the shadows up the scale, usually with much less noise and better shadow detail too.
- Check always the manufacturer’s brochure of your camera/lens for best settings. Also never trust the comments of other photographers concerning problems with noise/vignetting/casting issues unless you are absolutely sure that they are using the same camera, the same lens and the same filters and of course trust their opinion. Even in this case the light of the scenery can give contradictory reports concerning the above issues.
Can you tell me something more about Variable ND filters?
These tend to be more expensive and are created by stacking two polarizing filters. Any of the two polarized filters when rotated against one-another will create a fader effect and change the effecting light reduction of the filter within a set range. Generally the benefits of these filters are i) the flexibility (you only need 1 filter for a variety of different light scenarios), ii) there is no need to change all the time filters, iii) easy experimentation with different settings. The drawbacks are i) they are expensive if you only need some specific optical densities, ii) not so dark as they claim to be, and this is a problem only if you go for long exposure times, iii) there are reports about vignetting problems. Recently almost all the well known brands produce these kind of filters and i must say my knowledge is limited to the LightCraft Workshop product. So i will stop here saying no more about them.
Do I need a CPL when using ND filters?
Because you are using a neutral density filter does not mean that you cannot use a CPL as well. The main reason is that a Neutral Density filter has no polarizing foils in it. So for instance cannot cut reflections off of water etc.. There always many ways to use a CPL with neutral density filters. My two favorite ways are:
- If you are using Screw-In type ND filters you can always stack them on top of a CPL Nevertheless i have seen many shading issues. This is a common issue when you stack many circular filters (we will talk about it below).
- The other way around is to use a plate CPL. In the first slot of your ND holder goes your CPL which is adjusted to where it has the best effect and placed in the holder. Then use GND or ND filter in the second slot for its effect. One thing to keep in mind here is that the CPL adds another 2 stops of light filtering. So if stacking the CPL with the ND 3.0 filter, that is now 12 stops of light filtering.
Which is the right ND filter for me?
This depends on your needs, the amount of money you can afford to spend, your level of expertise and the quality of your camera/lens. Rather complicated? Not really. For the beginning i will give some general instructions about how to choose your ND filter using the type of lens as my only criterion. So for all the rest of this section you should know the diameter of your lens (mm.) and the optical density you want. Lets say that you are up to long exposures and you need a filter with a density factor 3.0 or close to that.
- If you go for a Screw-in Type all the ND filters of this type are configured according to the diameter of lenses, just check this along with its optical density and that’s all! Be aware that there are also Step-Up & Step-Down Adaptors. These prevent you from having to purchase a different screw-on filter size for each lens diameter (usually listed as 77 mm, 72 mm, etc.). One could then just purchase an ND filter that fits their largest lens, and use what’s called a “step-down adapter” to have this same ND filer fit on any smaller lenses.
- If you go for a Slot-in Holder Type then usually for a wide range of lenses the 100 mm rectangle is sufficient. Also in this case you will find many different sizes going from 67mm wide to 168 mm in some cases. The main reason one usually moves up to higher dimensions is because of the diameter of wide lenses, and in trying to reduce the chance of causing shading (vignetting) in a shot. As an example, someone with his 21mm lens tends to use 4×6 or even 6×6 filters because these lenses are 82mm wide. Once you put a filter adapter ring and holder on to the lens, an 85mm size filter would cause some shading. Because the 4×6 or 6×6 filters are bigger, so is the holder, which moves further away from the barrel of the lens and does not cause any shading. There are many photographers out there that tend to hand hold filters in front of their lens at times. The bigger piece of glass gives them more free space to hold the filter with without having to worry about their fingertips getting into the shot. Be aware that you still need a adaptor which should be of the same diameter your lens is. For Ultra-wide lenses the things are somehow different since the holding system has some important differences. We will talk about these in a later post.
- If you go for ND filters with small values of f-stop reduction (like 2 or 3-stops) then there are also some other solutions : a) Depending on the size of your GND filters, can be used as ND filters if the darker region is large enough to cover the entire lens. b) You can use the polarizing filters which can function as 2-3 stop ND filters, when this filter is rotated for maximum effect.
- You can always go for the Variable ND Filters & Stacking. With these, the strength can be adjusted without having to switch filters. Still here you have to purchase the appropriate size ( in mm.).
So what is for me , Screw-In Type or plate Filters?
I will still not answer to this, instead I want to give the full picture first. Lets give some advantages and drawbacks of these two different settings. The ND Filter Slot-in Holder Type is the most cost effective and flexible way to purchase any type of filter, in other words to buy a filter system which consists of a filter holder, an adapter ring for each of your lenses and a set of filters. The benefits of this system are:
- you only need an adapter ring for each lens. All the rest of the kit can be used for all your lenses (there are some limitations of course..we talked about them earlier).
- The filters can be rotated and we can also play with the vertical shift for special light conditions.
- You can avoid the vignetting by choosing the appropriate length of your filter (we already talked a lot about it in the previous section).
- The easiest way to install, remove change filters. You can focus , prepare your frame and very easily attach ND and ND grads in the various slots of your holder.
The only negative i can find is the higher start up costs as you need to buy the holder and attachment rings just to get one filter. I recommend you consider this purchase as an investment for all your future filters so get a good quality filter system as all you future filters will come from a single manufacturer and have always in mind that there is no point buying a quality camera equipment and putting a piece of cheap plastic in front of it!
From the other hand buying Screw-in type filters i guess is the simplest way to get filters in front of your lenses. The benefits of these filters are mainly the low start up cost and their sizes while their main disadvantages are
- some serious lens vignetting is produced for wide angle lenses as the filter edges are so close to the lens.
- For each diameter lens you need a new filter or the Step-Up/Down adaptors,
- graduated ND filters of this type are not flexible.
- difficult to handle them during attachment/detachment (recently XUME adapters came around with a smart solution for this)
What are the most common brands for these filters?
For plate filters, the 4 most common brands that make these filters are Cokin, Formatt HiTech, Lee and Singh-Ray. There are also some more but i will stay here.
- Cokin has ND, GNDs filters with small optical densities (until 0.8). The reason i mention here this company is that Cokin has a special way to name different dimensions of their plate filters. So the main sizes of plate filters are 67mm wide (Cokin A), 84mm wide (Cokin P), 97mm wide (Cokin Z and also popularly in inches of 4×6″) and 130mm wide (Cokin X-Pro)-this means that they also provide the additional holders. Now looking at other brands product lists like Singh-Ray you will find that they have filters with higher optical densities designed for these specific holders of Cokin. So if someone has already one of these Cokin holders can buy a ND filter with more efficient f-stops reduction.
- Formatt HiTech , a well known company, has redesigned their website offering except from a well-described product list also very informative videos concerning the use of their filters and holders. There is a rich product list containing a large number of kits with or without holders and optical densities from 0.3 to 3.0 (ProStop Series). I believe this is a very good deal since a kit comes with a better price than buying every independent item separately. I should add here also the new entrance in their product list the ProStop IRND Long Exposure Kit – Joel Tjintjelaar Signature Edition contains three densities of ProStop IRND (3, 6 and 10 stops) and is designed to allow photographers to easily shoot exposures of 5 minutes and longer.The sizes of the plate filters are 67mm, 85mm, 100mm, 150mm, 165mm for resin, glass type and there are also circular filters from 37 mm to 138 mm. The GND filters are 0.3, 0.6, 0.9, 1.2 also made from glass or resin.
Formatt-Hitech ProStop IRND filters are available in Resin between 1-10 stops of attenuation and Glass between 1-8 stops of attenuation while they provide holder types for 67mm (aluminum), 85mm (plastic, aluminum), 100mm(aluminum), 165mm(Lucroit type for ultra wide lenses) filters (see picture above).
- Lee is also a well known company for their reliable and professional ND, ND grad filters. Concerning the ND filters provides the Big stopper (ND3.0) made from glass and also provides some more with optical densities until 0.9 and GNDs until 0.9. Provides three holder types 100 mm System (100x150mm), Seven5 (75x90mm) and SW-150 (150x170mm) for the ultra wide lenses. A very informative and impressive website and educational video tutorials about the use of their filters.
- Is there much to say about Singh-Ray? A well known company for its ND products. Still this company is the most expensive out there. I have no experience of these filters so i just enter this company for reasons of completeness and also add that many professional photographers are using its products and the reviews are excellent.
For circular solid neutral density filters, the most common recommendations are B+W, Hoya, Formatt HiTech, Heliopan and Singh-Ray. All these brands have very positive reviews, (again for Singh-Ray remains the most expensive) and my personal experience comes from the first three brands so i will limit my study on these three. Hoya has a limited products catalog concerning the ND filters with ND400 being the darker one (close to 9 f-stops). From the other hand B+W and Formatt HiTech have a rich catalog of ND filters going up to 10 f-stops.
From my personal experience i recommend these three and since only B+W and Formatt HiTech reach the 10 f-stops reduction it is a good starting point to spent an amount close to 150 USD and start taking long exposure shots. Going now to the Holder type filters and of course i am talking about the Formatt Hitech and Lee brands you can start from around 350 USD depending on your camera/lens. The big advantage of Formatt Hitech nevertheless is the rich catalog of kits and of course the range of f-stop reductions you can have with their filters. We should also mention here that the Big stopper of Lee is still out of stock (back ordered to manufacturer).
What is Filter Color Cast and how can i avoid it?
I believe dealing with color cast in Neutral density filters is a common subject in every photographer’s community. It seems that all really dense ND filters will have some residual color cast. This is from residual IR that is leaking through the sensors hot filter. To understand this just consider a 10 stop filter. This filter has only 1/1000 of the original amount of visual light striking the sensor (transmittance); any IR contamination will now be 1000x greater over the unfiltered capture. Is this a serious problem? I am afraid the answer is YES and NO.
YES because this contamination decreases the quality and contrast of your images. NO because if you work with filters of the above mentioned brands and your photos are in RAW format this can usually be corrected by adjusting the photo’s white balance in post-processing.
However, in extreme cases, cheaper filters can introduce color casts which don’t correlate with white balance settings — making color cast removal much more difficult.
In the below SOOC photos you can have an idea about the color cast of filters, from three main brands, i usually work with. The B+W is copperish/orange (also Hoya gives something like this) while Lee gives something in bluish which as i said can be dialed out easily with a custom white balance or corrected in post processing. The quite interesting result comes from Hitech where there is almost no color cast as you can see. The reason according to this brand is that these filters have been optimized for digital sensors and reformulated with a nearly flat attenuation of both visible spectrum light and infrared light giving most neutral ND filter, especially at higher densities where other brands suffer from color cast. For extremely dark attenuation (16 stops for example used in fine art) infrared contamination will brighten the foliage to the point that the images appear as if they were taken with Infrared Film.
B+W ND110, f/16, 240secs
Big Stopper, f/16, 280 secs

Hitech ProStop IRND 10, f/16, 220 secs
So, what is your final verdict?
Now it is a good time to give my final answer to this question which is threefold
Talking for the place of a Fine Art Long exposure photographer i need two things.
- First to have the flexibility to work with many f-stops reduction in the area of 16 stops. This can be done using the Hitech Products or the SinghRay. Ofcourse i could also use a big stopper from Lee and a 6 f-stops from Formatt-Hitech/SingRay but i always try to use filters of the same brand. For me Singh-Ray products are too expensive and since i am satisfied with the ones i own i will not try to experiment with new brands. So i prefer the reliable solution Formatt-Hitech provides to me using a -10, -6 or two -8 ND filters. This range of f stops reduction is also used in the area of Architecture Fine Art photography.
- Second and maybe more important is to have an image ready for some intense processing without having banding issues or extra noise. This is accomplished with the new Hitech ProStop IRND series of ND filters since by blocking almost completely the IR contamination the quality of the photo is at high level.
Talking from the place of a Landscape Photographer i really do not care about the color cast at all. As a matter of fact i love color cast and i prefer to use it since it gives to my photos a dreamy feeling. Still there are many landscape photographers out there wanting to show the “real face” of a landscape. For all those both brands of Formatt- Hitech and Lee are reliable. Formatt-Hitech gives the extra bonus of less post-processing dealing with corrections of the white balance as well as better contrast/quality of the final photo. Also you can have these filters whenever you want while in the case of Big-stopper as i said you have to wait since these products are back-ordered to the manufacturer.
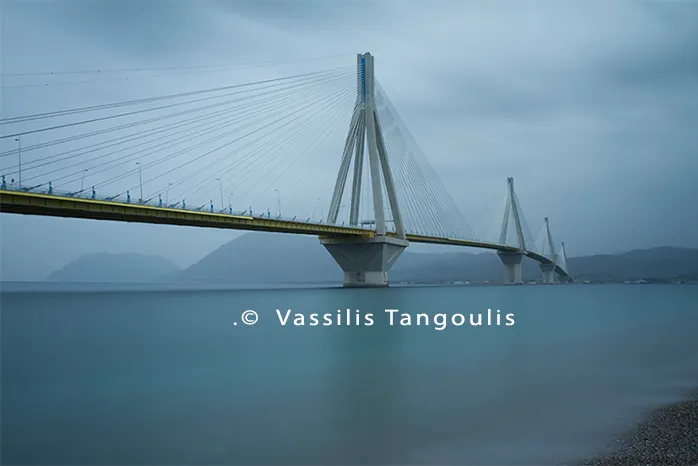
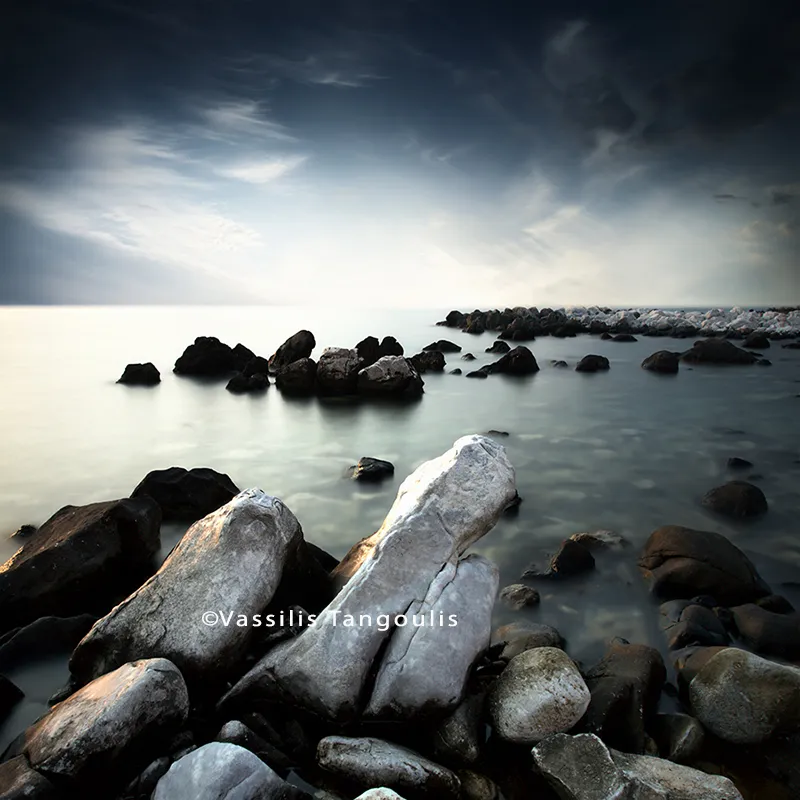
Just some recent photos taken with 16 f-stops reduction (ProStop IRND 10 +6)
f/16, 450 secs, 16 f/stops (Prostop 10 +6)
f/16, 400 secs, 16 f/stops (Prostop 10 +6)
Concluding remarks
When i started to learn about Long exposure photography and filters i had many questions but all the information was something like a puzzle game to me. I had to gather “pieces of knowledge” from different places and then try to make the full picture. This was my main motivation for this post and tried to answer the questions everyone would like to ask about this fascinating field of Photography. Always remember that the most important thing in Long Exposure photography-and photography in general is not the number and quality of filters or the camera or the lens. It is always how “effectively” you transform your inner world to “pixel-like” codes and messages in your photograph.